A mind-boggling 314 bottles of nail polish live in my house. Somehow they just keep creeping in!
Showing posts with label 31 day challenge. Show all posts

Saturday, October 1, 2011

Day 17 - GLITTER!

*ahem*

Today, day 17 of the challenge, is the glitter day! Now I know some say glittery nails is immature, but what do I care? I wear what I like to wear.  And glitter makes me happy.

For this post, I wanted to do a true glitter bomb!

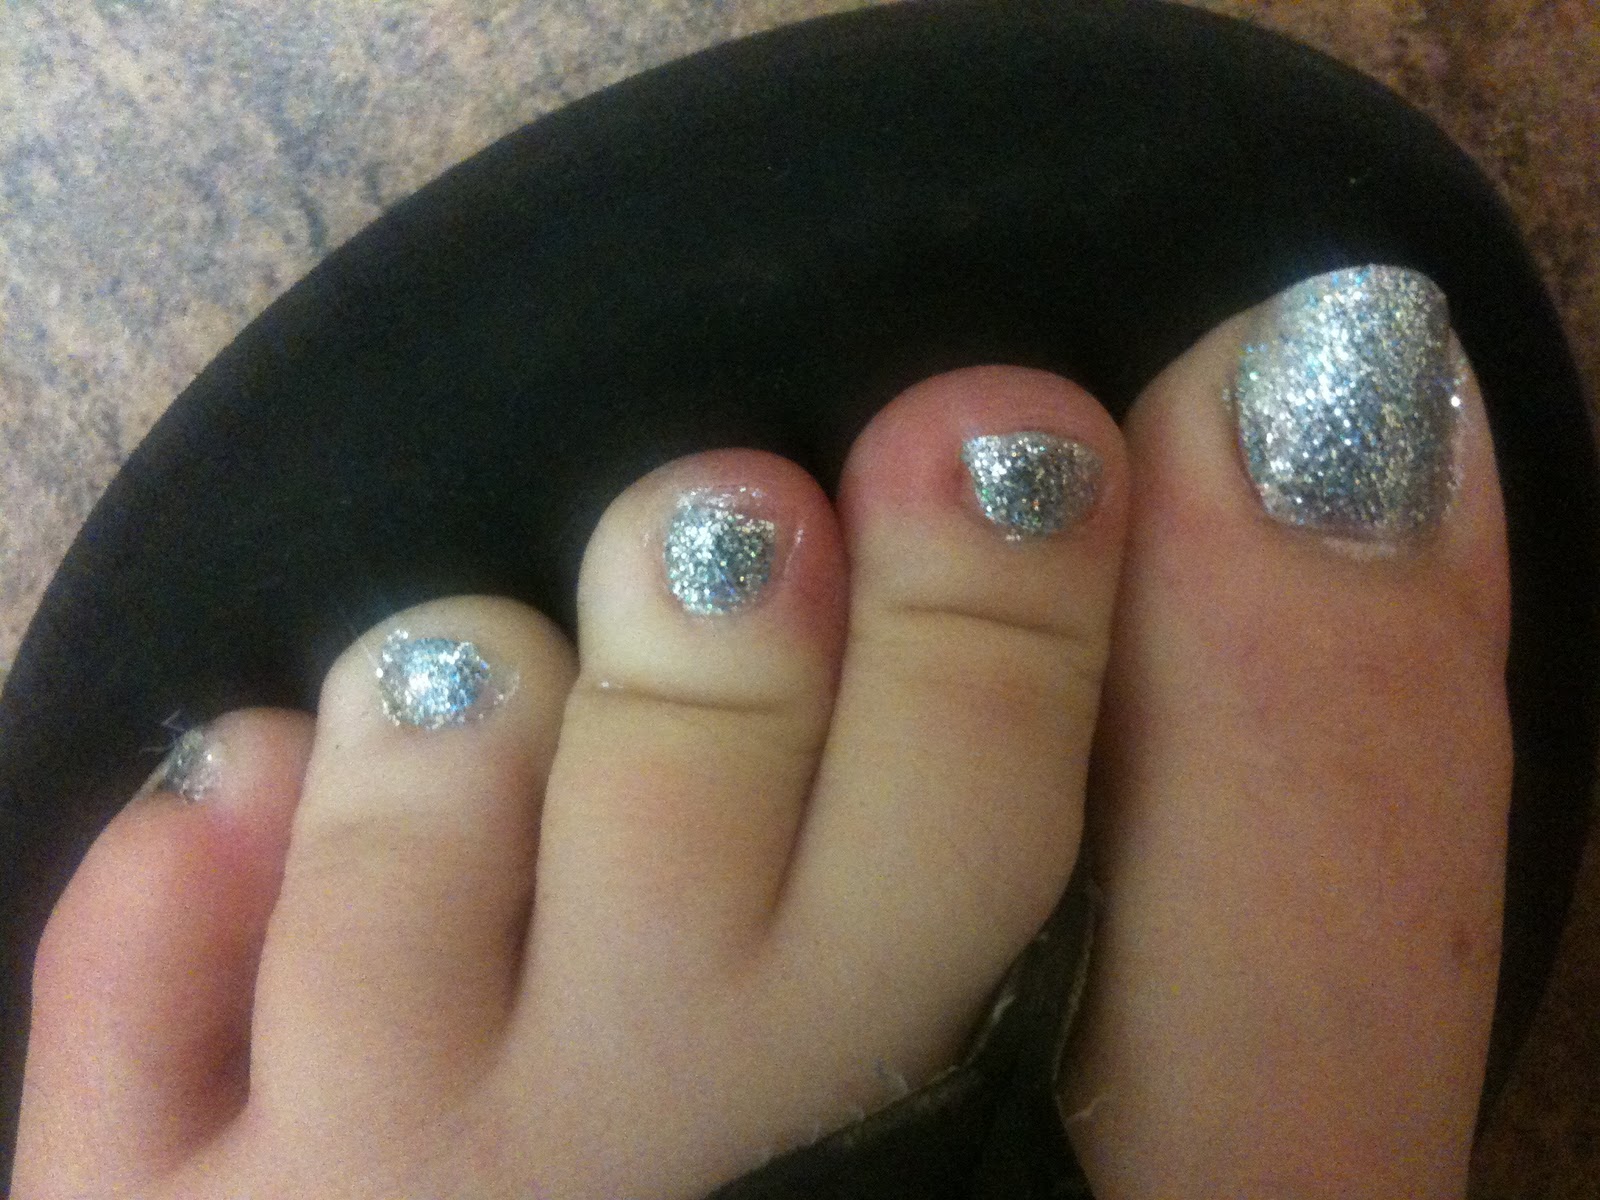
I used one coat of Sinful Colors - Queen of Beauty and two coats of Funky Fingers - Baby, Baby, Baby.  Both are fairly opaque, at least for glitters.  I'd say they would individually be able to cover completely in two or three coats.

But the important part is that they are blindingly reflective and shiny!

At the same time, glitter is hard to remove, and I didn't want to put this on my hands just to take it off again the next day.  So..... onto my toes it went!  And I love it.  I'm wearing flip flops 24/7, thankfully it is still warm enough outside.

Without further ado, the important part.... the pictures!  You may need some sunglasses! ;)


Staring at her toes,
Maria

Tuesday, September 27, 2011

Day 16 - Tribal Print

Hi!

This manicure is for day 16 of the challenge, the theme is tribal nails! I've been looking forward to this one a lot.  I've seen so many gorgeous tribal manicures on the web and now I finally got around to trying my own.  This is why I recommend this challenge - it gets you to try things you might not do otherwise.

I decided to do a more subtle tribal nail pattern, that could be done in just two steps.  I love multi-step manis, but I wanted to see how good of an effect I could achieve with just tow coats.


I used SOPI Caught with My Khakis Down (hehe) and Barielle Cowl of the Wild.

Caught with my Khakis Down - I have the mini bottle of this, and it is TINY! Which is too bad, because I really love this color.  When I bought it in the early summer, it had a sign that said "upcoming trend" and boy were they right! Suddenly it seems like every brand is releasing their version of this khaki green.  This one goes on smooth and opaque in two coats, and I really hope I get a chance to get a full-sized bottle of it.

Cowl of the Wild- I got this polish off the clearance shelf at Ulta (along with most of the rest of the Style in Argyle collection).  It looks horrible in the bottle, because no matter what I do, it will not blend together consistently.  You can see in the picture.  However, once you actually use it... it was love at first sight for me! I have bought a lot of brown polishes, and to me, this is the perfect brown that looks like you dipped your nails in a melted hershey bar.  Opaque and dries glossy, I love it.

These two colors also play really well together.  :)

For my first step, I painted each nail half green and half brown, alternating sides and direction.  I did two coats of each color, and free-handed it.


For the second step, I went back with a tiny paintbrush from Michael's and added various dots and stripes and patterns as they occurred to me.  I think it turned out really well, and looks like it took a lot more effort than in actually did.  I recommend this to anybody who wants tribal nails without taking hours to do so many different layers, colors, and patterns.


(I'm really fond of this one) thumb:
 pointer:
 middle:
 ring:

(whoooooooaaaa overexposure much?!) pinky:


Have you done tribal nails on yourself? How long did it take? Was it worth it?

Ciao for now,
Maria

Sunday, September 25, 2011

Day 15 - Delicate Print

Hello everybody!

I'm sorry for the slacking in blog posts recently, I have had a truly heartbreaking week and I just was not able to keep up with posting.  But I'm back now and I have FIVE whole posts lined up and ready to post over the next five days :)

So, day 15 of the challenge was delicate print.  And like most of the people who I've seen that did this challenge, this caused me to stop and scratch my head.  Hmmm.... delicate print... what could that mean....  I decided to do a pretty little manicure with two very delicate colors, pastel pink and purple.

Colors I used

I started with a nude polish that I picked up in Italy this summer; after two coats I had an opaque enough base for what I wanted to do.  I then was going to do vertical stripes with three different colored shimmers that I had bought recently.  I'll admit, I mostly bought these for the bottles!! Aren't they just adorable??

Sup-ah cute bottles ;)

Unfortunately, the bottle is pretty much all they are good for.  They are shimmery, but so sheer that even when I painted them side by side on my nude base color, I could not see any difference in the color.  Bummer.  So I decided to just use three coats of the pink (ha) shimmer, which did eventually give my nails are very ephemeral, princess-y look.

I finished it off with a scalloped, purple edge.  I used a chrome purple (NYC Royal Foil) for this, because I knew it would be opaque in one coat.

Sorry, I took pics right after putting on cuticle oil, so the reflections of light look kind of like I didn't clean up.  But I did!  Also, avert your eyes from the poor nubbin.


Oooooh, I LOVE my ring finger nail in that pic! And pretty much all of them except the nubbin.

Even though it's not what I had in mind from the beginning, I really like the finished product, actually! It makes me think of a little girl's birthday cake. :)

I'm always looking for pretty new polish bottles to add to my display, but I can't afford to buy them if they don't have good polish inside too.  Do you have any polishes that you bought for the bottle, and then were disappointed by them? Or maybe they were actually really good?  

Enjoying the sunshine,
Maria

Saturday, September 17, 2011

Day 14 - Flowers

Hello all! I've had a very tough week, but today I was finally feeling up to painting my nails again... Resuming where I left off, we have day 14 of the challenge - flowers!  I haven't done a floral mani before, they always seem so intimidating.

Well, to make things even more interesting, I decided to make today another first: my first time stamping! :) It was trickier than I expected.

I started with a base of Sally Hansen - Very Cherry.  It is a strange name, since it looks very pink to me.  I got this from the clearance bin at Target actually, for $1, and wouldn't you know it, it is a near dupe to OPI Be a Dahlia Won't You? It is pretty, but not my first choice color for the future. Too muggle, haha.


I have a small stamping kit I picked up in Italy, it came with one default plate, so I can't tell you a plate # for it.  I attempted -- and partially failed, partially succeeded -- at placing these randomly all over my nails.  It was an interesting look, reminded me of a Hawaiian shirt! 
(These are the pics in progress - no cleanup yet)


Please forgive the sideways pictures - I'm trying out the new blogger iphone app! And while I *love* it, there is no way to rotate pictures. 
Now, I had in mind from the beginning the idea of doing a jelly sandwich - with stamping instead of glitter on the middle.  So I put one more coat of Very Cherry on top. I really liked the idea, and it is a great way to make subtle nail art, but in the future I will use a polish that is a little bit more sheer and jelly, since this one hid the flowers just a tad bit too much, in my opinion.


Well, that's it for tonight! 

Have a great nail day,
Maria 

Tuesday, September 13, 2011

Day 13 - Animal print

Hi all!

So, I am still pretty bummed about my bad nail break yesterday. :( I took a little bit of length off the other nails, and I also tried out squaring them off a little bit.  I couldn't bring myself to file them all down to nubbins to match the broken one, even as much as I like symmetry.

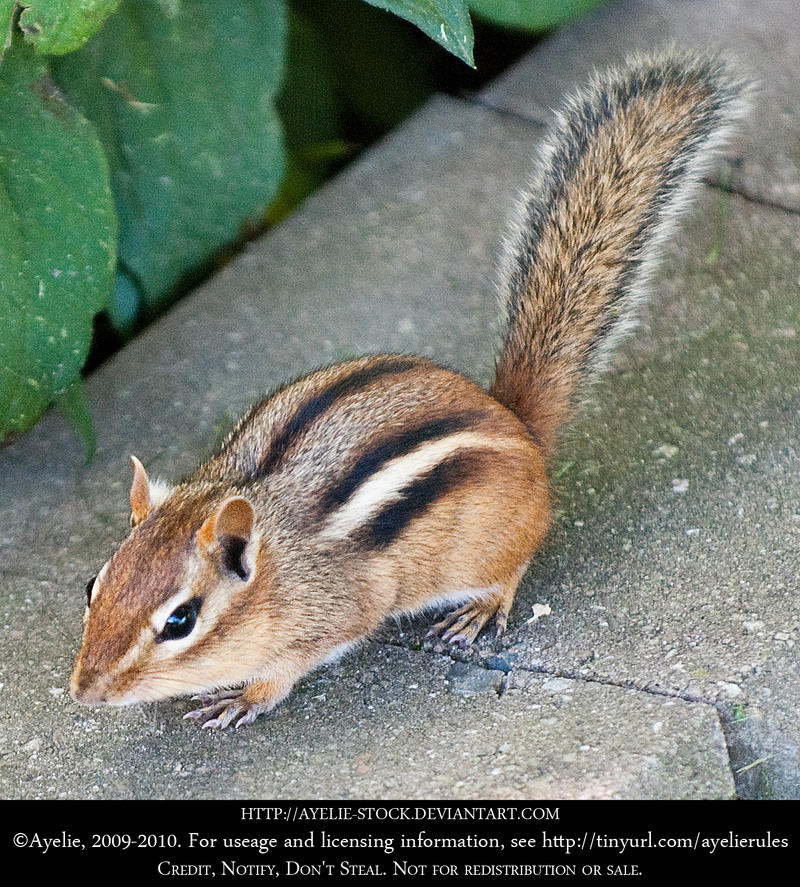
However! I do have some fantastic nail art for today!  Today was the animal print day in the challenge.  I've done a lot of zebra and tiger print, and just wasn't feeling leopard print... I wasn't sure what I was going to do, but then I was walking outside and a chipmunk crossed my path! I love chipmunks, I think they are so cute ^_^.  So in the spirit of woodland creatures (like my skunk mani the other day), I did chipmunk nails today!

These were my inspiration:


And here is the final product!


The rest of the post will be: which polishes I used; a sponging tutorial; and a chipmunk print tutorial.

For this mani I used my BRAND NEW, fresh off ebay, much anticipated OPI Ginger Bells.  Now, some nail enthusiasts call this a very ugly color, but I love it.  It is a rich brown-orange which looks just like pumpkin pie filling.  Unfortunately, i was so enthusiastic about this nail art, that I forgot to take a picture of just a Ginger Bells swatch. Woops.  

I also used Rimmel Grey Matter and Essie Case Study and black, white, and pink stripers for the art.


Now for the sponging.  I wanted to recreate the dappled back of a chipmunk, and I knew I couldn't do that with the normal paintbrushes I have.  

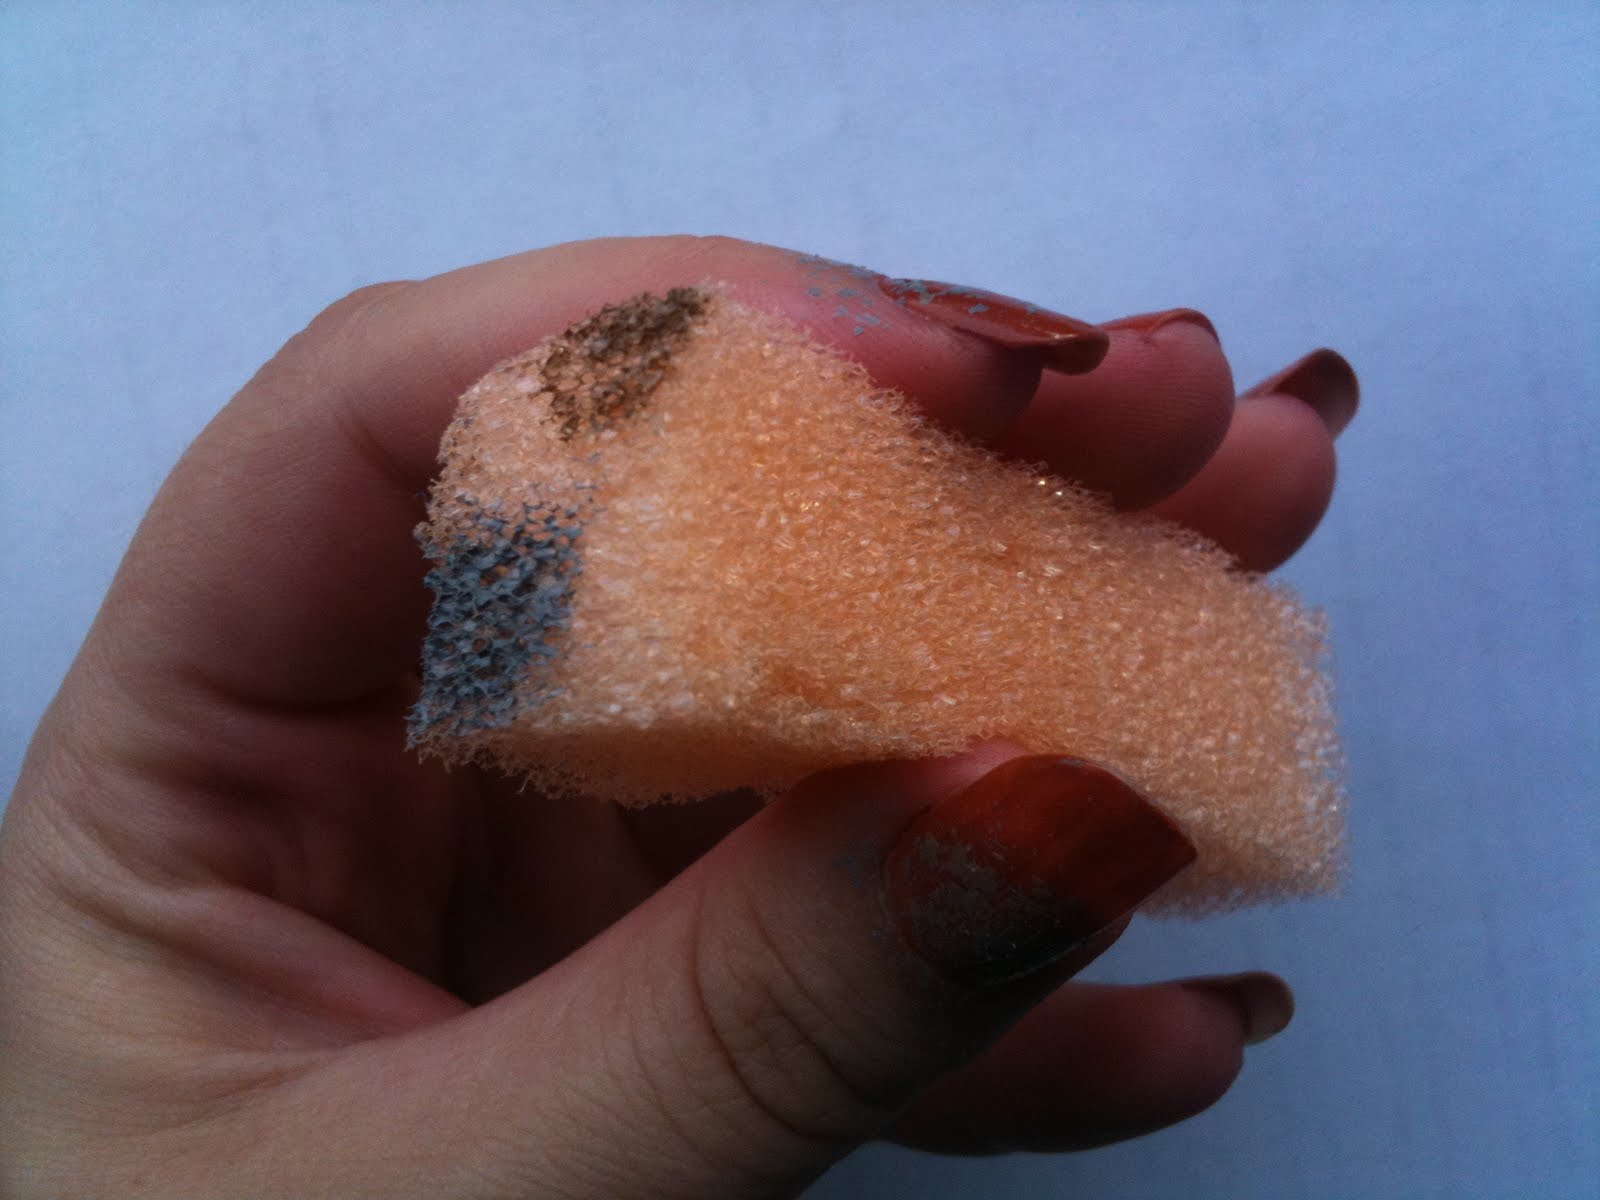
I have tried sponging in the past with those white cosmetic sponges, you know the ones, and I've never gotten the desired effect.  It was always too opaque.  I wanted a more sheer, speckle-y effect.  So from now on I use dollar store kitchen sponges!  I originally bought these for washing dishes, but when they were too flimsy, I switched back to the Target brand, haha.  These, however, turned out to be perfect for sponging polish on!  

Cheap-o flimsy foam sponges from the dollar store

Just cut a 1" or so wide strip off the sponge.  If yours are as cheap as mine, the rougher part will peel right off. 


Now use the smallest end for sponging; this way you can hold it kind of like a pen.  My method is to lightly paint a bit of the desired color on, and then sponge once on a paper towel to remove excess, then (with a light hand) sponge onto your nails.


Once you are done, you'll be left with a dirty sponge.  I imagine this would be a pain and a half to try and clean... and I bet acetone would just dissolve right through the cheap thing :P.  But never fear, there is an easy solution! This stuff is so light, you should be able to cut the very tip off with just normal scissors.


Voilà

It is ready for another ten-twenty uses... multiply that by about six more columns off the sponge... multiply that by six sponges (the amount that came in my pack, for $1)... and you can sponge and sponge all the gradients your heart could ever desire.

Onto the chipmunk pattern!  I started with a base of two coats of Ginger Bells. I would have used three if I was wearing it alone, but two coats was sufficient for my needs today.  Then I sponged on the Rimmel Grey Matter:  


This was me being random and heavy handed with the sponging; I've tried and you can easily create a smooth gradient too, if that is your desire.  This way I did it almost looks like a splatter mani!  Since the grey was kind of blue toned and I didn't love it yet, I sponged on some Essie Case Study, to soften it up, add depth, and make it more realistic and multidimensional like a true animal pattern.


Pretty!  Not by itself of course, but as a base for chipmunk fur, it is pretty.  After it dried, it was time for the black stripes first:


While those dried, I added the white on the accent nail, trying (and not succeeding very well on such a small nubbin *cry*) to copy the pattern on the chipmunk face.


While that dried, I switched back to the other four nails and added the white stripes.  Then I finished off the face with black eyes (made with a dotting tool that I pulled a bit to make it almond shaped instead of oval) and a pink nose.


Phew!  Next step: cleanup.  I've tried a lot of angle brushes, but the $2 maybelline brush from Big Lots is my absolute fave!! I've stocked up many backups, since the acetone is rough on them, but so far I'm still on my first one :)  Just dip it in pure acetone, wipe it on the edge of whatever container you are using (so you don't flood your cuticles with acetone and ruin the design!), and then clean up around the edges!  Easy peasy.  Don't forget to very frequently wipe the brush on a paper towel and re-dip in the acetone. 


Then some Seche Vite top coat, and it is done!


My final verdict? I LOVE the print I did on my four nails.  I absolutely do not love the face on my nubbin.  However, I was frustrated by its size... I think if I redid this on longer nails and spent more time on the face (smaller black stripes along the white ones and with a grey glint in the eyes) I might like it more? I'm not sure.  But I definitely am a fan of the chipmunk back pattern.  It it surprisingly subtle from far away, but sophisticated looking.

Whew! Long post.  But it wasn't a very long mani.  Took me about 45 minutes, since sponging and striping don't take me very long at all.

So, what do you think??  Would you do this pattern?

Was the sponging tutorial helpful?

'Til next time,

Maria


Monday, September 12, 2011

Day 12 - Stripes

Hello x2!

As you saw in my last post an hour ago, I am currently in emergency nail repair mode, and therefore unable to post the normally scheduled stripes manicure for today, as the challenge calls for.  I will instead post a cute little striped mani that I did over the summer.  Again, don't blame the pictures too much, these were never intended for a blog audience.  (That reminds me! I got my digital camera today! YAY! There shall be better pictures in the future!)

SOPI - Don't Feed the Hand Models
OPI - Funky Dunkey
OPI - Ogre-the-top Blue
... and some white polish that I don't remember...


First step:


Second step:


OH! And I also painted my friend's nails yesterday! (She chose the colors. Sally Hansen Royal Foil, Essie French Affair, and OPI Jade is the new Black)


Well, hopefully all these poorly lit, weird angled pictures are enough to distract you guys from the fact that I don't have a fresh new mani today! I'll be back up and running tomorrow, I promise.

Love y'all,
Maria